
How to set up SSO for Create with own App Registration
Set up your Azure app registration to allow single sign-on into Create
This guide shows you how to set up your Azure public client app registration to enable you to access your Create tenant via SSO. It is based on the generic Microsoft guide to setting up public client app registrations, expanded with the information required to enable SSO for Create specifically.
Prerequisites
- A Microsoft Entra subscription.
- Administrator permissions for the Azure portal.
Create an app registration
To create an app registration for a username/password authentication flow, follow these steps:
-
Sign in to the Microsoft Azure portal using an account with administrator permission. You must use an account in the same Microsoft 365 subscription (tenant) as you intend to register an app with. On the Home page of the portal under Azure services, select Microsoft Entra ID.
- Alternatively, you can also access the Azure portal through the Microsoft 365 admin center. First, choose All admin centers in the left navigation pane, select Microsoft Entra, and then select Go to Microsoft Entra ID. Next, in the left navigation pane of the Microsoft Entra admin center, expand the Applications node.
-
In the left navigation pane, select App registrations > + New registration on the App registrations page.
-
On the App registrations page, enter your application's registration information as described in the table:
- Name: Enter a meaningful application name that is displayed to users.
- Supported account types: Select Accounts in this organizational directory only ([YourOrganizationName] only - Single tenant), unless there is a need for authenticating several Entra ID tenants.
- Redirect URI (optional): This step is necessary, but can be added later on the Overview page under Essentials. Select Single-page application (SPA) and enter the URI value of
https://app.omnidocs.cloud/auth/callback. Then select Register.
-
Select Register to create the application registration. The app registration overview page is shown. Remain on that page.
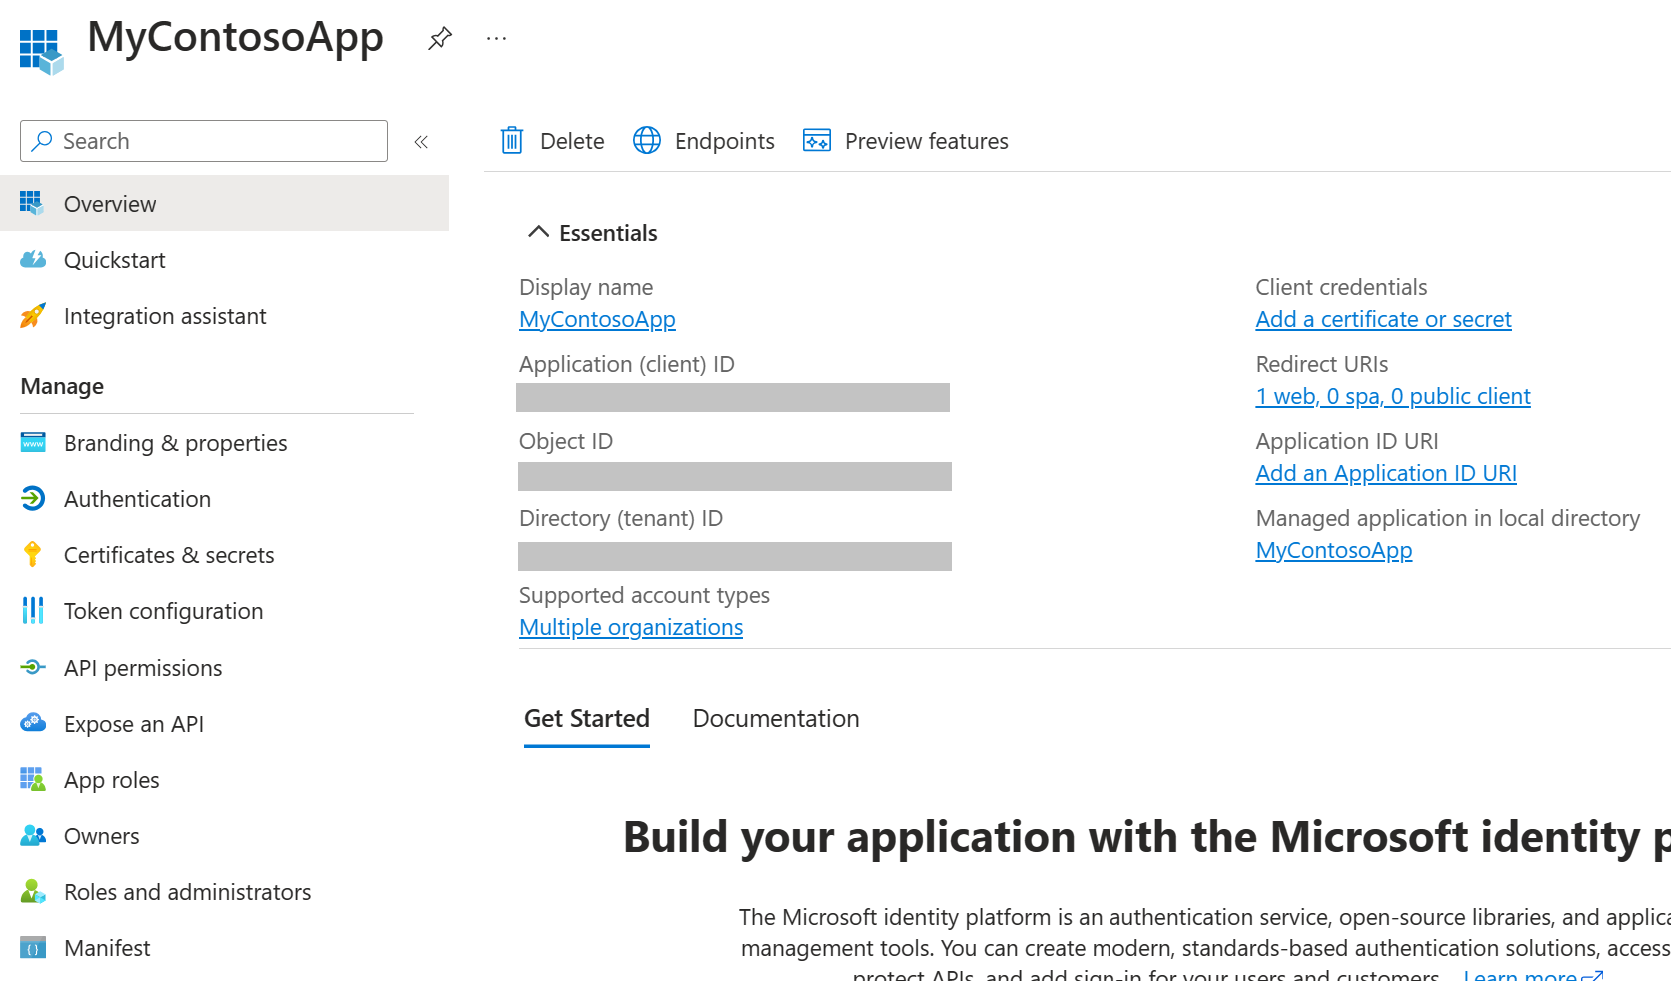
The Overview page of the app registration.
-
On the Overview page of your newly created app, hover the cursor over the Application (client) ID value, and select the Copy to clipboard icon to copy the ID value. Record the value - we'll need it to configure your tenant.
-
In the left navigation pane, select Manage > Expose an API.
- Select + Add a scope.
- Accept the generated Application ID.
- Set Scope name to API.Access.
- Set Who can consent? to Admins and users.
- Set Admin consent display name and Admin consent description as desired. The consent will allow Omnidocs access to your users.
- Set the state to Enabled.
- Select Add scope.
-
In the left navigation pane, select API permissions > Add a permission.
-
Under APIs my organization uses, select the name of the app registration that you created and set in Step 1.
-
If prompted, select Delegated permissions.
-
Select API.Access > Add permissions.
-
Select Grant admin consent for
<OrganizationName>even though it might look like it is already checked. Next, on the popup, select Yes to grant consent. If you do not approve consent here, your app will receive a consent error at run-time.
Note
If the Grant admin consent for<name>is ghosted (non-selectable), you do not have permission to set this value. More information: Admin consent button, User and admin consent in Microsoft Entra ID -
-
In the left navigation pane, select Token configuration.
- Select + Add optional claim.
- Set Token type to Access.
- Select verified_primary_email and Add.
-
In the left navigation pane, select Authentication.
- Under Advanced settings > Allow public client flows, set Enable the following mobile and desktop flows to Yes. Then Save.
-
In the left navigation pane, select Manifest.
- The manifest is a JSON file. Depending on if it's in the Microsoft Graph format or Azure AD Graph format, it's going to contain a property called either
requestedAccessTokenVersionoraccessTokenAcceptedVersion. Find one of them, and set the value of the property that's present to2. - If you want to use custom claims, you need to set the
acceptMappedClaimsproperty totrue. The value isfalseby default. Configuration of new claims is done in the Enterprise application. - Save.
- The manifest is a JSON file. Depending on if it's in the Microsoft Graph format or Azure AD Graph format, it's going to contain a property called either
You'll need to share the App ID, Tenant ID, and Scope ID with us so that we can create an organization for you. If it hasn't been agreed upon before, let us know about the domain name that you'd like to use. We'll let you know when you're ready to go, and then you should be able to log into your Create tenant at https://{domainName}.omnidocs.cloud/create. Reach out to us any time if you encounter any issues.
Updated about 1 hour ago